| Getting Started | |
Using the Property Editor
In plot editing mode, you can use a graphical user interface, called the Property Editor, to edit the properties of objects in the graph. The Property Editor provides access to many properties of the root, figure, axes, line, light, patch, image, surfaces rectangle, and text objects. For example, using the Property Editor, you can change the thickness of a line, add titles and axes labels, add lights, and perform many other plot editing tasks.
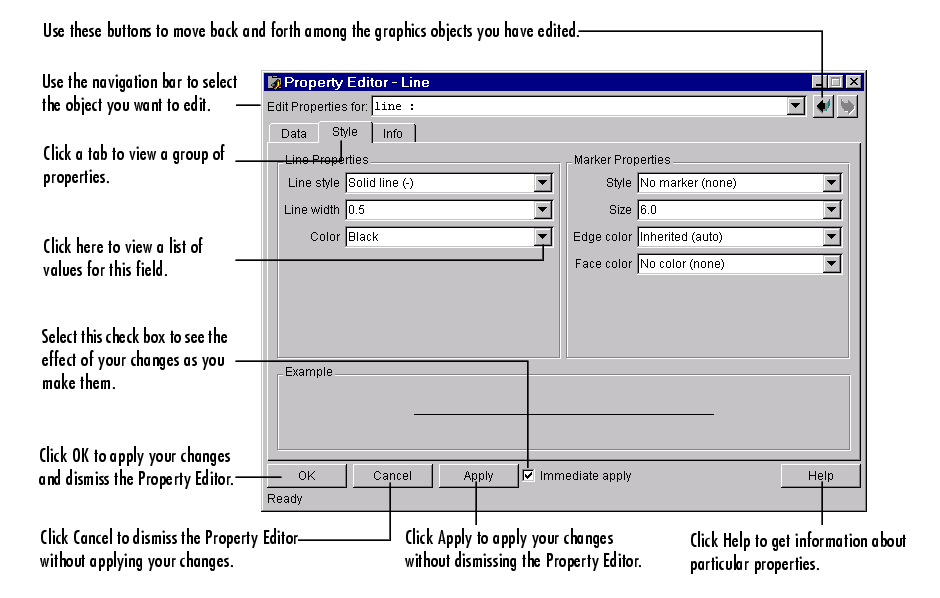
This figure shows the components of the Property Editor interface.
Starting the Property Editor
You start the Property Editor by double-clicking an object in a graph, such as a line, or by right-clicking an object and selecting the Properties option from the object's context menu.
You can also start the Property Editor by selecting either the Figure Properties, Axes Properties, or Current Object Properties from the figure window Edit menu. These options automatically enable plot editing mode, if it is not already enabled.
Once you start the Property Editor, keep it open throughout an editing session. It provides access to all the objects in the graph. If you click another object in the graph, the Property Editor displays the set of panels associated with that object type. You can also use the Property Editor's navigation bar to select an object in the graph to edit.
| | Using Plot Editing Mode | Mesh and Surface Plots | |