Affective Social Quest(ASQ)
    Teaching Emotion Recognition with Interactive Media & Wireless Expressive Toys

    CHAPTER THREE: SYSTEM DESCRIPTION Chapter Index

Affective Social Quest, developed in Java, ties together several systems: a therapeutic setup interface with an online guide, a media element rich screen interface with a video clip presentation in the center, and a set of wireless plush dolls for the input device interface. Presented are the design goals with an explanation of how and why aspects were chosen, the challenges faced in development and the operating modules for the apparatus used in the child testing.

Application Design

Design Goals

The design goal of the system includes three objectives. The first objective was to provide a series of clips to children registered in the system and record their responses as measured by their touching a doll. Second, to provide a practitioner with a customizable interface for each child. Third, to provide different modes of operation for heterogeneous-type group.

In the original design a play-based environment was considered in which the child could interact with the system so that the child would drive the interaction. In this design concept, the doll initialized the system when picked up. Picking up the doll would activate the doll to express itself by making an affective sound, lighting up, or jiggling. These doll mechanisms were to reinforce the affective expression on the doll’s face and demonstrate the emotional quality of that doll. Picking up the doll would establish a feedback loop between the doll and the system and retrieve a video clip to match that emotion. When the doll was set down in front of the screen, the video was to play a scene where an actor or animated character would express the same emotion as the doll. Each time the character on the screen would evoke an emotion, the doll would express that same emotion as well, for example when the character on the screen would giggle the doll would giggle too. Each time the doll expressed itself, a new scene would emerge on the screen showing another way that that emotion could be shown. When a new character would appear on the screen, the doll would express itself again, a new scene would appear, and so on, thus completing a system loop.

The advantage of this design was the child-driven approach and the entertaining way the system interacted because of the child’s selection. Though this approach could be fun, there was concern that this approach might create confusion for an autistic child. Also an autistic child’s ability to recognize emotion using this style of interaction could not be measured. Because meaningful data could not be collected on how well the child distinguished the different basic emotions, a different approach was implemented.

ASQ displays an animated show and offers pedagogical picture cues -- the dwarf’s face, word, and Mayer-Johnson icon -- as well as an online guide that provides audio prompts to encourage appropriate response behavior from the child. The task was to have the system act as an ever-patient teacher. This led to a design focused on modeling antecedent interventions used in operant behavior conditioning. In essence, ASQ represented an automated discrete trial intervention tool for teaching emotion recognition. Now the video clip initializes the interaction instead of the doll.

The current system starts with a clip displaying a scene with a primary emotion (antecedent) for the child to identify and match with the appropriate doll (target behavior.) After a short video clip plays, it returns to a location in the clip and freezes on that image frame, which reinforces the emotion that the child is prompted to select. The child then indicates which emotion he recognizes in the clip, or frame, and selects the appropriate doll matching that expression. The doll interface, which is the only input device to the system, creates a playful interaction for the child.

Surprisingly, a play-mode still remained part of the system and promoted social interaction when used in a different context, play versus training. By assigning dolls to each person seated around the computer, this interaction creates social play between group members and their doll, which serves as their avatar. When an emotion displays on the screen anyone can interact using his or her doll to match the emotion shown. For example, if Johnny recognizes the happy emotion on the screen and player Jody has that doll, Johnny can say, "Jody, you have the happy doll," thus promoting joint-attention. Johnny and Jody now share communication and affect; communication when Johnny tells Jody to match emotion with his doll, and affect when matching the doll to the displayed emotion.

The system, affective social quest, gives a child the ability to view a sequence of movie segments on the screens that demonstrate basic emotions. By the system prompts, the child also has multiple representations for the emotion presented. Within the application the child can see several expressions for each emotion from a variety of clips. The dolls and characters associated with a particular emotion will hopefully encourage the child to mimic the vocalization, facial expression, posture or gesture they see on the screen.

Practitioner Interface


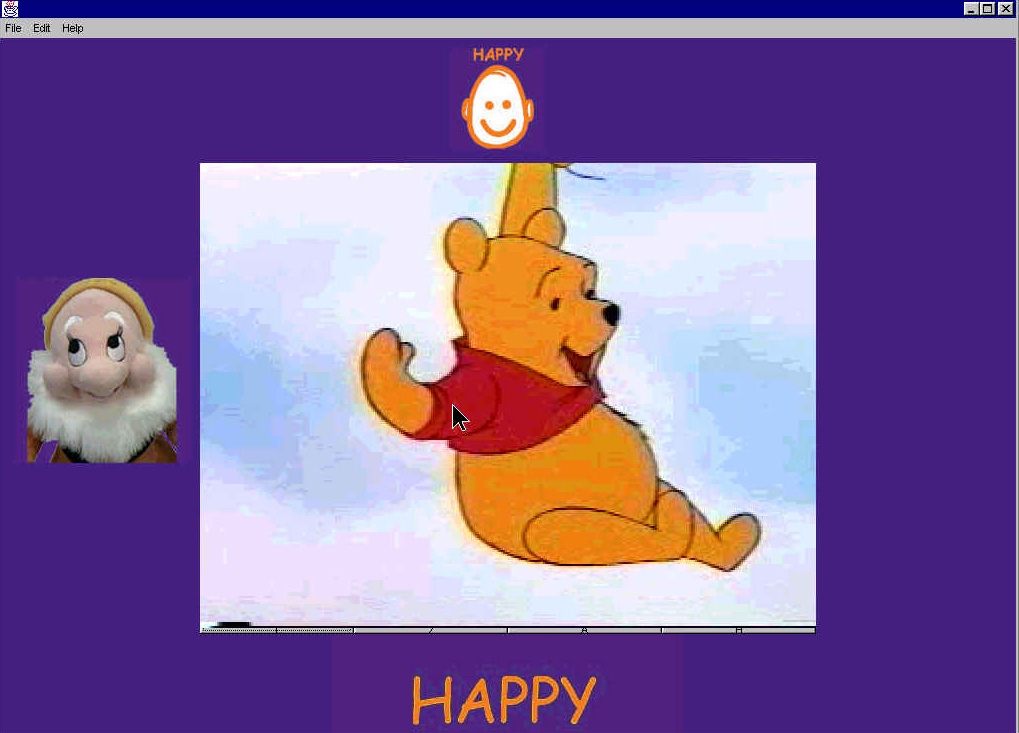
Figure 3: Child Screen Mode

The screen interaction has two different parts: child and practitioner. The child interface displays elements that were configured by the practitioner. The number of available options enhances the interaction capabilities by allowing the practitioner to set up a specific training plan for each child session, as done in manual behavior analytic trials. Presented are the screen layouts for the practitioner and the reasons for choosing that interface.

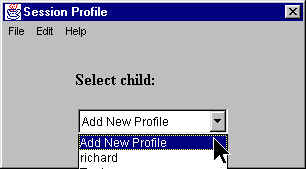
Figure 4: Practitioner mode

A configuration interface set up by the practitioner before a child session offers flexibility and customization for each session. Based on the interface options and clip configuration setup for a session, the screen may include one or all of the following picture aids: Mayer-Johnson standardized icons representing the emotion, the word for that emotion, and a picture of the emotion shown on the dwarf’s face. These prompts can vary six different ways and be ordered or repeated by the parameters chosen. Also, an optional online guide can be displayed to prompt (discriminative stimuli) for child interaction, or with system verbal reinforcement (putative response) for child affirmation.

This section presents the elements of the design, shown in screen captures, to provide an inside view of the application windows. The practitioner can register a new child or select the pre-set profile for the child and then set up the child session. The session will display the presentation on the child’s screen based on the practitioner’s selections in the configuration window.


Figure 5: Create Profile Screen

The practitioner interface contains four main windows: Session Profile, Add New Profile, Success History, and Configuration. A fictitious set up for demonstrating the flow of how the practitioner interacts with the following windows are presented using the name Johnny.


Figure 6: Add New Profile

  The practitioner gives each child a unique profile. The Add New Profile option in the Session Profile window automatically brings up the Add New Profile window for registering a new child into the application. The demographic data for that child includes Profile Name (child’s name,) chronological Child’s Age, and the Deficit level of the child. The deficit level for each child is rated low, medium, or high by trained psychologists and neurologists based on the child’s primary deficits related to social-emotional communication. The practitioner selects the profile name from the Session Profile and the Success History window appears. This is the main window to the application.


Figure 7: Success History Screen

Success History displays the child’s success overview and sessions to date. The window presents the original interface designed in the application. The Emotion indices indicate the emotions presented to the child with the child’s performance rating for each emotion. The performance rating, Fluency shows the child’s percentage of correct responses to date for each emotion. Fluency is discussed later with the other performance measures. The child overview presentation helps the practitioner view the overall success for that child to date. Instead of averaging the overall data to date, more details were gathered trial by trial for each session. The final software version used the data differently than shown here, so the emotion indices are not updated by the system. More will be said later about these measures and the method that was used in the pilot test conducted at the Dan Marino Center.

The Success History screen is the gateway to other resources in the system. The options Configuration,View Statistics, Different Profile, and Start Session allow for accessing information stored by the system. Different Profile returns to the Session Profile screen and Start Session begins a child session. Configuration and View Statistics will be illustrated and explained below. Here is the original design describing how the child’s success could have been viewed.

Configuration brings up a window for configuring the session interaction. The window contains two configurations that can be set up for the session: Interface Options and Clip Configuration. Interface Options list different cue options for each Cue number and clip configuration.

Many different Cues are displayed in the interface screen for the child interaction. Visual aids can be selected to display on the child screen: icons, word, dwarf, guide, and pop-up. These form the first category of selectable options. The next category is Doll Cues. Dolls can cue the child with one of the following three choices: affect sound, hatband lights, or internal vibration. Continuing to the right, the next category is Guide Cues spoken by an online guide.

Figure 8: Interface Options section of Configuration Screen

The guide audibly plays one of three different sequences to prompt the child to select a doll to match the emotion in the video clip. For instance, when a happy clip plays, the guide will say, "match happy" when Match is chosen, or say, "put with same" when Same is chosen, or say, "touch happy" when Touch is chosen. Likewise, reinforcements for incorrect doll selections will say, "that’s sad, Match Happy" for Match. One row of selections sets up one of seven configurable options for the interface. After each Cue has been selected for one Cue, another set of hints can be selected.

Seven different cue set-ups are configurable for one session with the timing, sequence, and repeat rate tailored for each Cue. The Seconds Until Cue select box allows the practitioner to set the time interval between each Cue series. The variety and flexibility of Cue options give the practitioner a tiered approach for setting up the interaction most effective for a particular child.

The order in which the Cues will occur can be set in the Next Cue selection box. The flexibility allows the practitioner to experiment with different Cue approaches to aid each child towards his best performance in emotion recognition.

The last Cue category includes the option of a reinforcement clip. When the child selects the appropriate doll, the guide reinforces that selection and says, "That’s Good, That’s <emotion>" the correct choice selected. An option to reward the child with a reinforcement clip that plays for five consecutive times can be selected by clicking that check box.

Special clips are selected and stored as reinforcement clips in the database. Reinforcement clips are not focused on emotion as much as on rewarding the child with entertainment – for example, the Winnie the Pooh Tigger Bounce song is played– and may reinforce the child’s match of the correct doll and motivate the child. A reinforcement clip plays after the child touches the correct doll. After the next stimulus clip plays and the child matches that emotion, the same reinforcement clip will repeat; the clip repeats five times before a different set of the same reinforcement clips play. The reinforcement clips are selectable from the clip configuration screen.


Figure 9: Clip Configuration section of the configuration screen

Clip configuration offers customization as well. Each column can be sorted by clicking on any one of the headers Title, Source, Complexity, Duration, Primary Emotion or Filename. The ability to sort gives the practitioner a quick view of different aspects to choose between or to group together. Clips can be deselected by highlighting the clip or series of clips and hitting the space bar. For example, Cinderella may not be the best stimulus clip for one child because the clips may be too complex or the child has watched them many times at home. Alternatively, certain emotions can be deselected in early trials.

The design objective was to offer as much flexibility to the practitioner as possible for customizing the screen interface for a particular session or child. This is especially important because autistic children usually have unique idiosyncratic behaviors. Clicking the Done button returns the practitioner to the Success History screen. A session using the configuration just set up is started by clicking the Start Session button.

Child Interface


Figure 10: Child Interface Screen

The practitioner interface sets up the child screen interface. The child screen interface provides a therapeutic environment with sub systems to create a heterogeneous way for the child to interact with the application. Following are the media elements to the child interface.

The screen interface serves as an output device for the application. This session screen was designed to allow the child to view images in a consistent location. Images of the icon, dwarf, word, and guide always appear in the same spot. The panel allows enough area for each to be displayed unequivocally and frames the video clip nicely. Initially, the idea was to have all the images appear in the bottom bar, but this crowded the screen and could distract the child by drawing unnecessary attention to that area and away from the video.

Figure 11: IconsFigure 12: Armbands

The different cues intend to complement existing teaching materials and to reinforce the images in the system. Mayer-Johnson is the originator of Picture Communication Symbols (PCS) and has a set of 3,200 symbols used in many schools for communication by nonverbal and autistic individuals to visually aid communication (Mayer-Johnson 99). Each doll comes with its own removable icon that can be used as a matching cue or removed for advanced interaction. Incorporating these icons was to complement certain standardized teaching methods.

Figure 13: Words

Words are coupled with each icon picture. Nonverbal and autistic children often learn words from pictures, such as the PCS, and will sometimes carry a book containing these images to communicate with when they are not able to articulate verbally. Speech and language pathologists help children use the pictures to learn words and to construct a story. In keeping with this model, the word appears over the icon as well as in its own screen frame.

Figure 14: Guide

The guide animates to engage the child either with a positive reinforcement or a prompt to help the child make the correct selection. The guide may appear on the screen if the practitioner chose this visual aid. The guide displays no affective content to keep it separate from the other emotion labels in the application.

The visual guide is animated with its mouth moving. The decision to animate the guide’s verbal prompts with flat affect was because the bear, the displayed guide, represents more than one emotional state while the rest of the interface is directly paired to a single emotion, the importance of consistency led to choosing no affect in the guide’s speech.


Figure 15: Dwarf Faces

The dwarf faces help the child in matching the appropriate doll. The face contains the outward and visual expressive part of the doll. The visual matching helps children to match the dolls with the same emotion from the content they recognize in the video clip.

Another visual feature includes a pop-up window overlaying the video clip. The pop-up is a very short video of someone expressing one of the four emotions. This feature did not get implemented in this version of the software, but was included in the interface as a placeholder for when it would later be added.

The purple background color emphasizes the important content of the video in the center while not being too bright, which might be potentially distracting to the child, nor too dark, which might confuse the child by seeming like a negative reinforcement. The child interface was implemented after many revisions based on suggestions from professionals in the field.

Video Clips


Figure 16: Static Images of Video Clips (angry, happy, surprise, and sad)
Source
Collections of video clips of different styles, such as animation, drama, pop television, or documentary, were considered. However, after several video segments were gathered and reviewed, the reader team decided that animation should be used to reduce the amount of uncontrollable noise in each clip, which might distract the child from recognizing the emotion.

Animation, in general, minimizes the background in a scene and the focal point is usually on the main character. Secondly, animation exaggerates the features of emotional expression. Disney and Pixar spend great efforts in representing the quality of emotion in each pixel of an expression. Animators catalogue expression and movement for posture and facial expression, particularly for eye expression (Thomas 95). Pixar, for example, has a room of mirrors where animators can try to mimic the postures and expressions of the emotion they are trying to depict as they animate a character.

Included with the animated expressions are realistic human expressions from television child programming, such as Blues Clues. Though the selection of these clips represents a small sample of the available programs, it was hard to find a variety of clips to represent each emotion, whereas the breadth for the happy emotion was abundant in both non-animated and animated footage (57% happy, 16 % angry, 15 % sad, and 12% surprise of 518 total clips (see appendix for list of sources.)

Length

The clips include short segments where most are no longer than a minute. They are rated as short (0-4 seconds), medium (5-10 seconds), or long (10 plus seconds). Emphasis was on the expression in the clip and not the context. The time it takes to express an emotion is extremely short. In many cases, the clips were lengthened to avoid chopping related audio or visual content expression.

The clips were not professionally edited. In special cases though, the clips were rendered using Media 100 or Adobe Premier. The challenge was to crop the video segment in order to capture the whole audio track for a scene while keeping the visual content focused on the salient expression. In normal interaction, words blend with other words and clipping them leaves disturbing audible sound. People previewed the clips to validate footage and commented on the audio cuts, so time was spent recapturing segments to reduce those awkward cuts as much as possible.

Emotion Labels

The system provides children with a set of visual images that they can associate with a particular emotion. A varied set of expressions for each emotion may help the child to generalize that emotion. Therefore, different scenarios of the same emotion in different settings were provided. The selected clips were rated on clip complexity. The scale for determining the clip’s complexity, low, medium, or high, was based on the criteria listed in Table 1.
Low Complexity Criteria Medium Complexity Criteria High Complexity Criteria
  • little background noise
  • (multiple characters or distracting objects or movements)
  • only one character in scene
  • single emotion displayed
  • obvious emotion expressed
  • some background noise 
  • (like multiple characters or distracting objects or movements)
  • two or three characters in scene
  • single emotion displayed
  • clear emotion expressed
  • background noise 
  • (like multiple characters or distracting objects or movements)
  • two or more characters in scene
  • multiple emotions may be displayed
  • complex emotions expressed
  • Table 1 : Clip Criteria

    Format

    The video clips were collected and digitized using the Moving Picture Expert Group (MPEG) standard. MPEG is a video format standardized by the International Standards Organization (ISO) for digital video. The digitization compression stream for encoding and decoding was defined so that captured digitized footage could share this format internationally. Companies develop their own compression algorithms but follow the format set up by ISO.

    MPEG-1 was the format chosen because of the compression rate and decoding compatibility across various applications, and mainly because the Java JMF version included that format in its API. The MPEG-1 code pattern uses still image data, intra frames (I frame), and bidirectional frames (B frame), then predicted frames (P frame) in its coding scheme, e.g. IBBPBBPBBPBB (MPEG 97).

    Evaluation by Practitioners

    While designing and developing the application several professionals were consulted. Their continual guidance in the development of this project was invaluable. Boston area evaluators included professionals from some centers that treat children with autism: Cambridge Children’s Hospital; The May Center; and The Occupational Therapists Association. In addition, two specialists from Miami Children’s Hospital, Roberto Tuchman and David Lubin, collaborated in the application design. David Lubin participated in early stages of development when he visited Cambridge and both Tuchman and Lubin selected candidates for ASQ child testing where the pilot took place in Florida. Miami Children’s Hospital has a special center for intervention programs. As stated in their brochure, "The Dan Marino Center is a comprehensive medical center for children with developmental and chronic medical needs." More information on the center can be found in the appendix.

    Content Critique

    The first stage of evaluation focused on video content. After Media Lab ASQ team members collected footage clips from television programming, it became evident that the content could be too complex for the demographic pool of children targeted for testing. Adult programming, though containing interesting depictions of emotion, often presented complex expressions and contained a lot of distracting information in the scene. For example, footage from Sienfeld episodes contained too many scenes with background distractions, and when these were viewed frame by frame, the actors displayed mixed emotional expressions. Therefore, content shifted to focusing on animation and to keeping the clips short, without including situational content. Animation shows characters that exaggerate their emotional expression and the scenes include less background noise. Situational context for the emotion was not as important; the goal was to represent the way the emotion was expressed, not necessarily why it was expressed.

    Video clips for the target audience -- children between three and five years of age -- were collected. After the animation and the children’s television programming clips were digitized, professionals in the field of autism reviewed a videotape sampler with samples of these clips. The responses back from the viewers validated the decision to include animation and to keep the clips short, to less than thirty-seconds. Children’s programming, from shows such as Baby Songs and Blues Clues, received positive appraisal and were added to the collection of clips to show real children expressing emotion.

    What surprised most of the viewers was the way the clustered set of emotions affected them when they viewed the sampler. For instance, the cluster of happy clips elated the viewers. They commented on feeling happy after viewing only a three-minute segment with twenty different happy clips edited together. Likewise, angry and sad had the same affective sway towards them feeling those emotions. Their feedback helped identify clips that contained complex emotions and were labeled complex or eliminated from the collection because these were not illustrating basic representation of an emotional expression.

    Interface Critique

    A prototype of the system was reviewed in a meeting to discuss the application design. In attendance were medical professionals from Boston Children’s Hospital and members of ASQ’s reader team. The decision to create a behavior analysis application was approved. The primary goal was to see if children would engage in the application and be able to potentially learn to recognize emotional expressions depicted in the video clips. One noticeable characteristic of PDD children is their attention span. Often they are easily distracted and their attention quickly shifts, which may contribute to their delay in learning. If a system could keep children’s interest long enough they might enjoy what they learn. If engaging them is successful, the potential benefit to these children could be enormous. This application might help children learn social communication if these children could be engaged in the video clips and match them to other representations for that emotion. If they could identify emotional expressions in people while in a social situation, perhaps they could also understand the context of the situation.

    In the meeting, the idea to possibly incorporate a play-mode into the application design was suggested. This was similar to the initial idea of creating a doll driven system. Those who recommended this approach were curious as to whether children preferred a play mode to the behavioral mode. From a design standpoint, to include both a video driven system and a doll driven system required the interaction in the application to be re-designed to switch back and forth between both modes. This was difficult to resolve, particularly when statistics were gathered based on the child recognizing an emotion. Capturing the interaction between the child and doll is easiest with one interaction approach. The doll driven concept has thus become part of the future work ideas.

    Operational Modes

    Plush Toy Interface

    Figure 17: Dwarf Faces

    Video segments initiate ASQ interaction, but to play in this environment, plush doll dwarves are employed. ASQ uses four interactive dolls that represent the basic emotions, angry, happy, surprised and sad.

    ASQ, being an interactive system, also helps in the development of joint-attention. Joint-attention, as mentioned earlier, is a social skill for pointing, sharing, and showing. It incorporates eye-gaze and turn taking with another person. Some autistic children are just not interested in eye contact, and thus rarely initiate it. They prefer to play by themselves, often with inanimate objects, but may not like the loneliness of playing alone. ASQ can help by having different dolls act like playmates.

    The dolls may be set up to offer helpful cues during the child session. Each doll either vocalizes emotion, internally jiggles, or its hatband lights up to cue the child to make the correct selection. After the clip has played the appropriate doll will activate one of the cues set up in the configuration. Though this was implemented in the doll hardware, child responses to these were confusing and not used in the pilot at Dan Marino. The child could not easily attend to both the doll cues and the screen cues at the same time. The inclusion of the doll cues may be added in more advance levels of interaction with ASQ, after the child shows success with screen cues.

    Interactive Modes

    The system design has two modes of interaction -- an applied behavior mode and a story-based mode. The first mode displays short clips, one at a time, from various child program sources and the second mode displays an entire movie with the story segmented by the emotions. When the video freezes, the interaction is the same for both modes until the correct doll is selected.

    Applied Behavior Analytic Mode

    The design targets children with prior early intervention using a discrete-trial method of instruction. To complement this approach of teaching, the system evolved to represent a stimulus reinforcement (behavioral analysis) model for interactive learning.

    Applied behavior analysis (ABA) uses operant behavior to shape behavior with reinforcement and prompting methods. Given a stimulus, the respondent is to behave in a trained way. The behavior is modified by continually reinforcing the correct behavior while shaping other behaviors toward the expected result. For example, discrete-trial training procedures derived from strict principles of behavior analysis and modification typically address singular developmental skills until some mastery has been observed. This process includes repeated trials over a specific amount of time. In each trial, a practitioner presents an antecedent cue (discriminative stimulus) and, dependent on the child’s ensuing response, presents the specific consequential event to either reinforce the response, or prompts the child in order to increase the probability that the targeted skill will be exhibited on subsequent trials (Lubin 89). Although highly effective when administered by humans, this method is highly expensive and labor-intensive due to low teacher-to-student ratios. ASQ attempts to offset the time demands on the practitioner with a complementary tool.

    ASQ implements operant behavior in its ABA mode. A guide’s verbal response or reinforcement clip rewards the child’s correct behavior. The guide also provides repeat prompt responses to incorrect dolls selected by stating the doll selected and re-requesting the desired response. Additionally, different screen cues offer matching aids for shaping the behavior. The child can either directly pattern match -- the picture of the dwarf’s face on the screen to the dwarf doll, a screen icon and word to the icon with same word on the doll armband -- or use standardized intervention tools. All the cues, dwarf’s face, icon, and word, help the child to generalize the emotion to different representations. They assist the child in identifying one representation and associating it with the expression played in the video clip. As the child’s performance increases, these shaping aids can be eliminated, leaving just the video clip stimuli alone.

    Story-Based Mode

    The story-based mode uses the same interface but instead of short random clips, a whole movie plays. This mode was added because of a suggestion made during early pilots of the system when it was in development. The story includes situational context for the emotion, whereas the mode above just presents short clips from various sources. When an emotion is represented by the system, the system freezes on that frame and goes into the operant behavior mode until the correct doll is chosen, then resumes until the next emotion displays. In this case, the clips are not disjointed but flow together. The disadvantage to this mode is the length of play. The movies often are one hour in length, and with freeze frames this mode tends to be longer than most manual intervention sessions. This mode, although implemented, was not included in any of the children’s trials.
    Application Development
    The software application will run on most compilers, like the Intel family CISC or Alpha family RISC processors aimed at Win32 environment. It was developed in the Win32 environment, under Windows -95 and -98 and NT, and written in the software programming language Java. The system controls all the different software modules: serial communication, application clock, Java class for database management, and Java media player. The backend uses a SQL database, Microsoft Access, and uses SQL to talk to the queried information with JDBC/ODBC. The application uses the Java Media Framework (JMF) application programming interface (API) for incorporating media data types (JPEG images for interface elements, MPEG video for video clips). JMF could be used for the animated JPEG images for the online guide and audio files for the online guide’s reinforcements, but was not implemented this way in this application. Instead, the other media pieces in the interface are handled by Symantec packages, Symantec animated image player and Symantec sound player, respectively. The JMF 1.1x API architecture plays media elements (video clips) in the video frame. Video clips coded in the database are retrieved by the system based on the selection criteria chosen in the configuration screen. Media elements are part of the visual-based system and display on the child’s screen (see ASQ Team).

    The hardware interfaces the dolls to the system through infrared communication. Dolls are embedded with iRX 2.1 boards. The iRX is a circuit card measuring 1.25" × 3" with an RS-232 serial port, a visible light emitting diode (LED), an infrared LED, and an infrared detector. A 12-bit micro controller, PIC16F84, made by Microchip Technologies, Inc. controls the board (Poor 99). The iRX 2.1 uses five of the programmable integrated circuit (PIC) input-output (I/O) ports; the remaining eight ports are used by the applications that control doll features: toy detection switch, affective sound recorded voice box, haptic internal vibration motor, and hatband LED lights.

    Each toy has a unique ID recognized by the system. The system sends codes for each session to the doll for custom responses based on condition parameters. The system continually polls the toys to identify the doll selection from the child’s touch on the touch switch over a set period of time. The dolls continually request data from the system to activate their appropriate applications based on the system’s configured cue features.

    As stated, the system is designed with a great deal of flexibility so each session setup is customized for each child by session. Also, the system is extendable. The system can include custom clips tailored for the child. Digitized clips can be loaded into the database located on the hard drive and retrieved randomly with the others in the system.

    Software


    Figure 18: Application Architecture

    The Java programming language was chosen to develop the application because of its system portability, rapid prototyping capability, and media rich packages. Designing the system behavior was challenging because of the desire for built-in flexibility. The application uses a multi-threaded

    environment with two application programming interface (API) architectures -- JDK and JMF. This coupled with the transfer of interface information synced to the system clock made debugging a complex and daunting task even for minor modifications.

    The system is subdivided into five primary task functions illustrated in figure 18. The main program manager is the application puppet master. It manages the different functions in the application. Being multithreaded, it keeps track of the system interaction and associates it to the media and syncs it to the system clock while polling the serial port communication for hardware interaction. The database is the main repository for data inputted or selected for interaction.

    The system continually updates its cached arrays based on the response interactions the serial communication and the cue interactions set up in the configuration. Each 250 ms of interaction time is recorded and stored in memory until the system is exited.

    After the application is executed the JDBC-ODBC establishes a bridge between the database and the Java source code. This connects the front-end to the backend and manages the data passed between long term and short term memory. Using SQL select statements, the application collects data and writes it to an array or to respective database tables. At the system execution, it calls the database and requests profile names using SQL SELECT statements.

    There are five database tables queried by the system. ASQ executes JDK 1.1.x. from an MS-DOS prompt window of a Win32 environment running Windows 95. The application instantiates a session frame and a Java database class. The database is queried using JDBC/ODBC, the bridge between the Java source code and the database (Microsoft Access). Names of all existing profiles are selected and their addresses are loaded into a table accessed by the application from the system’s memory. When the practitioner creates new profile, a window for the new session frame is instantiated for profile data to be inputted: profile name, deficit and age. When the Done button is clicked that new entry is added to the application table and later stored in the database for that new child profile. If the practitioner chooses an existing profile success history is instantiated and the frame displays in the window on the screen. Originally, this frame was to include statistics on the child’s performance to date. The frame still exists as part of the interface, but the fields are blank. A different method of data gathering was implemented as opposed to having the application calculate an aggregate performance rating for the child’s over all sessions.

    A configuration frame is instantiated when the configuration button is clicked on. The new frame displays flexible set up options. In the clip configuration section of this frame video clips are listed and are sorted by the system through Symantec’s application-programming interface (API) package. In that same frame are interface options. Clicking on radio buttons activate application interface features: guide responses and screen displays for the six cues. When that done button is selected, all the configuration parameters are written cached and dynamically accessed by the application based on the system clock associated with the selected features. After a session the parameters are saved into memory in an array string until the session application is exited. The array data is then written to a comma separated value (CSV) file with interaction responses recorded during the interaction.

    Clicking on the statistics button instantiates the frame where statistics were going to be stored. The original design was going to include statistics computed by the system and presented in the Success History frame. The intention was that the application would collect data for each profile, calculate the statistical measures and keep a running sum of these measures, which were to be shown in this frame. These were aggregate statistics for the child. With the expansion of the data gathering task a different method of statistical presentation was chosen and changed the data structure. The data is now exported to a CSV file to be read into a spreadsheet program, such as Microsoft Excel. This design changed in the last stage of the system development. It was thought that each session’s data should be preserved and that it would be best if more data could be collected on the child session interactions. As stated earlier, the new approach made the initial design of the data structure obsolete and these fields in the frame are blank. The screen currently displays no information based on the child performance.

    Export of the data is called from the menu bar, under File > Export Data, where the practitioner is prompted to give the path and file name for the two files. One filename is for interaction values and the other is for interface options set up by the practitioner in the configuration frame. Data is written to the CSV file at the time export is selected from the menu-bar. Data is collected for all interactions from the last export data to present export data. The system array is cleared with each export and system shutdown. It is important that session data collected for each session be exported after the session to keep the data separate from session to session or from child to child. When the application is exited, then data for parameters, video frames, and interaction intervals (in milliseconds) stops streaming and is downloaded into the comma separated file.

    Three threads run together and share the system processing. The main thread controls the frames (windows), a secondary thread controls the serial communication for detecting doll interaction and another controls the data passed to the application array for the CSV files and manages upcoming media elements for the interface. The two secondary threads run their own clock: the serial runs at 250ms and data runs at 150ms. These threads are handled by methods written in the main program.

    The main thread controls a JMF panel that deals with the video clips played in the center of that frame. The secondary thread, managing the data, sets up the next frames and waits in the background to be called by the main program. For example, data continues to be stored in the array with addresses accessed from the database, and passed back and forth while serial communication from the doll detection and doll activation are handled by the other thread.

    JMF dictates the timing of the video frame and other screen interface elements. The application interaction has to wait until that clip completely plays before the application performs another task. Garbage handling became a major problem in early development because of the rapid growth in virtual memory taken up by the interface elements. Each time a clip played, Java’s garbage collector was called to clear all memory except array data and interface components. Initially, either no garbage was deleted, or no garbage was collected. With the help of developers on the JMF development team, code was re written based on their suggestions.

    Hardware

    Each time the system receives the code of the emotion shown on the screen, a signal is sent to the corresponding doll. The doll will exhibit a specific response to represent the emotion it depicts. For the verbal doll cue, happy doll may giggle and angry doll may grunt depending on which clip is playing. The toy’s purpose is to reinforce an emotion symbolically.
    Doll Switch

    Figure 9: Doll's Touch Switch

    The touch switch illustrated is a copper laid tape formed into a switch separated by Velcro and cloth. When the switch is touched, the copper tape creates a contact on each side causing an interrupt to occur in the component software, signaling that that doll was chosen. The touch switch pad was made using cloth so that it was soft and could not be felt when the doll was touched or lightly squeezed. The touch pad is located in the tummy of the doll, underneath the doll’s shirt clothing.

    Doll Packaging


    Figure 20: Doll's Hardware Box

    An iRX board controls the component applications for each feature of the doll selected in the interface options. The dolls are each configured with a touch switch, speaker, pager motor, and band of four LED lights. The features of the doll are stuffed inside the doll and the wires from each component go through the doll’s back and into its backpack. The black box contains wiring for each component connected to the iRX board powered by a volt battery. All the hardware fits into each dolls’ backpack. The backpack provides a storage container to maintain the plush interface of the doll.

    Doll Features


    Figure 21: Dwarf Front and Back View

    The hatband for each doll contains an array of LED lights, LED receivers, and black transmitters. Each is threaded on its own wire for ground and power. Each wire strand is insulated with plastic casing to shield it from other wires and hot glued for extra protection. The three threaded strand -- one for LED lights, one for transmitters and one for receivers -- are woven together, strategically separating each strand and offsetting them between each other. The strand forms a u-shape that fits on the doll’s head and was sewn into place. Four emitters were selected. The goal was to extend the range of wireless communication. It was effective, though it reduced the communication distance between the system’s receiving device attached and the dolls from nine feet to three feet. The change in distance did not affect the interaction because of the doll’s close location to the system’s receiver box.


    Figure 22: Doll's Recording Unit

    The affective sound for each doll was recorded onto a microphone hardware chip that has a quarter watt output. A single twenty-second audio sound was recorded for each doll. The component is threaded through the back of the doll’s head and the speaker is placed in the doll stuffing around the doll’s mouth.

    Inside each doll is a pager vibration motor. The motor is inside the doll’s nose and causes the whole doll to vibrate when activated. Originally, the idea was to have the doll visibly jiggle and move on a flat surface, but the amount of power and size of the motor exceeded the system power source capabilities. This motor offers a good haptic sensation through the doll when the motor is activated and can be felt anywhere on the doll.


    Figure 23: Doll's Stand

    The dolls are mounted on a table with recliner boards and adhered to the table with Velcro. The Velcro prevents the recliner boards from sliding when a child pushes the selected doll. The recliner holds the dolls upright for the child to see them easily from a chair and pick them up to play with. The ease of placement on the recliner allows the dolls to be arranged differently on the table or for one or more to be removed from a session.

    Wireless Communication


    Figure 24: System Communication Box

    The data communication interface between the doll and the system uses infrared to wirelessly transmit signals between the system and dolls. A doll’s tetherless feature allows the dolls to be played with as well as to be arranged in various positions on the table during child sessions.

    The dolls receive codes from the system and activate subprograms located in the hardware and stored on the iRX board. These programs run the different doll features. For example, codes sent to the doll could be one of the following: for happy either sound, light, or vibrate (HS, HL, or HV) ; sad to either sound, light, or vibrate (SS, SL, or SV) etc, respective of the interface option set up in the interface by the practitioner. Dolls send codes to the system to indicate whether they are present or detected from a touch on the touch switch: (happy (H), sad (S), angry (A), or surprised (Z)).


    Figure 25: Doll's iRX

    Doll programs run a system loop to detect whether one of two things take place: a signal has been receive, or a doll has been chosen. When the doll receives a code, it is processed by the doll’s program to determine what feature was requested, and the doll performs that featured action. When a doll is touched the touch switch interrupt shifts from high-to-low and a code is sent the system, causing the interface to respond based on the code sent. This infinite loop continues until either of these code signals occur.


    Figure 26: Doll's Communication Device

    The doll program looks for the ID from the system based on the touch switch interrupt. The system continues to perform this test until either the identification signal is detected or a cue to the doll is sent, activating one of its cue indicators. The infrared receiver has an interrupt handler in the software for detecting transitions and responds accordingly.

    Andrew Lippman originally suggested toys for the interface to engage the child. The use of toys as the physical interface explored research opportunities to investigate serial communication using multiple objects with one system receiver. Existing toys, such as the ActiMates dolls, can interface with the computer, but it are not capable of recognizing more than one doll at a time. The interaction through this interface as well as the communication between the multiple input devices explored a novel way of computer interaction.

    Apparatus

    The pilot study was conducted at the Dan Marino Center in one of the therapy rooms. The room was eight by eight feet, with one outside window and one window to another office. A Toshiba Tecra 7000 laptop ran the ASQ application on a Pentium Pro(r) with 191 MB RAM in Microsoft Windows 95 4.00.950 B operating system, executed from a MS-DOS prompt window. Two screens, one for the practitioner and another for the child, were set up with a video camera angled towards the child and dolls with the practitioner’s screen in the lens view to capture the screen while ASQ ran during the interaction. Speakers were attached to the system to amplify the audio of the application. Connected to the system, at the base of the child-viewing monitor, was the system communication box with four transmitters and receivers directed toward the dolls.


    Figure 27: Appartus for Study

    Four toy dolls representing primary emotions were the child’s input devices to the application. Each toy doll was loosely positioned on the table on a reclining board adhered to the table with Velcro pads. The dolls were mounted on reclining boards facing the wireless communication box and child-monitor. This allowed the children to see the entire doll in front of them. The dolls could be picked up easily from their stand, but were intended to remain on the stand and to be selected by the child when pressed the belt-buckle of the chosen doll.

    General Procedures


    Figure 28: Child's Interaction

    The goal was to see if children can correctly match the emotion presented on the child-screen to the emotion represented by each doll. For experimental control the same dolls were used with each child.The automated training was arranged to teach children to "match" four different emotion expressions, e.g. happy, sad, angry, and surprised. A standard discrete-trial training procedure with the automated application was used. Subjects sat facing the child-screen that exhibited specific emotional expressions under appropriate contexts within the child’s immediate visual field. A video clip played for between 1 and 30 seconds. The clip displayed a scene in which an emotion was expressed by a character on the screen. The screen ‘froze’ on the emotional expression and waited for the child to touch the doll with the matching emotional expression (correct doll). After a pre-set time elapsed, a specific sequence of visual prompts displayed on the computer monitor and auditory prompts played through the computer speakers.

    If the child touched the doll with the corresponding emotional expression (correct doll), then the system provided an online guide that audibly stated "Good, That’s <correct emotion selected>," and an optional playful clip started to play on the child-screen. The application then displayed another clip depicting emotional content randomly pulled from the application.

    If the child does not select a doll or if he selects the incorrect (non-matching) doll, the online guide provides a verbal prompt: "Match <correct emotion>" for no doll selection, or "That’s <incorrect emotion>, Match <correct emotion>" for incorrect doll selection. The system waits for a set time configured by the practitioner and repeats the prompts until the child selects the correct doll. An optional replay of the clip could be set up before the session, in which case the application replays that same clip and proceeds with the specified order of prompts configured in the set up. If the child still fails to select the correct doll, the practitioner assists the child and repeats the verbal prompt and provides a physical prompt, e.g., pointing to the correct doll. If the child selects the correct doll but doesn’t touch the doll after the physical prompt is provided, then physical assistance is given to insure that the child touches the correct doll.

    Experimental Conditions

    Three different visits were scheduled for each child. During these visits, the child interacted with the application for up to one hour. All children began with the same screen interface for the first visit: all cues on the screen with a playful reinforcement clip for the correct selection. The configuration of the application varied for the children based on their level of emotion recognition and prior session performance.

    Statistics Gathered

    Based on session data -- the child profiles, the system configuration, clip configuration, and response times for each interaction -- the system was designed to calculate performance ratings.

    A decision to collect details of each child’s interaction changed the data structure for the original profile statistics. The change to the data collection method changed how the system treats the data. The changed collection method monitors the child interaction in milliseconds using the system clock. The interaction parameters set up by the practitioner and the randomly retrieved video clip for one trial is written to an array stored by the system. The system collects the time, in milliseconds, that the child touches a doll. For each set of screen aids for one cue and the video clip data for that one clip shown to the child, the system records each doll the child selects and when they selected it. All these data points are written to an array table for each video clip trial. When a session is complete, all the array values, one for each trial, are exportable using an export function in the application. These values are written to a comma separated value file that lists the trial interaction values and the data can be viewed using a spreadsheet program to view the trial data in the spreadsheet rows. With these values, performance ratings can be manually computed. It was thought that the independent trial data would contain more information than a summary to date of performance ratings generated by the system. Below are the formulas used to compute the measures.

    Measures of Response Rate (Ri) are used to track the number of training trials (opportunities during each session as affected by subject compliance).

      Response Rate given multiple response classes (corrects/errors) is:   R i = n ( rc + re ) i                                                  Where:       R i = Response Rate in a specific training session
             ---------------------                                                                            r c = Number of matching doll correct responses


                                                            T i                                                                                       r e = Number of incorrect matching doll responses

                                                                                                                                  T i = Elapsed time under that specific session

    Accuracy (Ai) will be used as an index of how effective the training procedures are for teaching the children to match the targeted emotion during a given trial by tracking changes in the proportion of correct responses during each session. For example, if an angry clip plays and a child picks the following dolls, happy, sad, happy, happy, and then angry, r c = 1 and r e = 4. Accuracy given multiple response classes (corrects/errors) is:                 A i =         n ( rc ) i                                                       Where:         A i = Accuracy in a specific training session                             ---------------------                                                                          r c = Number of matching doll correct responses
            n( rc + re ) i                                                                          r e = Number of incorrect matching doll responses
    Lastly, indices of fluency were calculated for each session. Fluency represents a performance summary of how many correct responses were made. Let Rmax be a constant indicating the perfect response rate possible. Rmax is calculated by summing the average time for the application’s media to be presented and the average time for the expected flawless response. Averages for transitions in the application are used to calculate Rmax under two conditions, with reinforcement clips and without reinforcement clips: clip duration = 6 seconds, transitions for guide prompts and media frames = 1 second, and ‘optional’ reinforcement clip = 15 seconds. Rmax with reinforcement clip is 1/(6+1+15) = 0.045. Without reinforcement clips it is 1/(6+1) = 0.143. Excellent fluency is a result equal to 2 obtained when the correct doll is touched without any delay (r c/Rmax = 1 and accuracy A i = 1).

    Fluency with known physical constraints over response rate is:

     
    Fi =        Ri                                                                        Where      R i = Response Rate
                                 ---------- + A i                                                                         A i = Accuracy
                                   R MAXi                                                                                     RMAXi = Maximum possible response rate


     ASQ_Chapter 2:_Background

    Chapter Three Index

    Chapter Three Title: System Description Application Design Design Goals
    Practitioner Interface Figure 3: Child Screen Mode
    Figure 4: Practitioner mode
    Figure 5: Create Profile Screen
    Figure 6: Add New
    Figure 7: Success History Screen
    Figure 8: Interface Options section
    Figure 9: Clip Configuration section
    Child Interface Figure 10: Child Interface Screen
    Figure 11: Icons
    Figure 12: Armbands
    Figure 13: Words
    Figure 14: Guide
    Figure 15: Dwarf Faces
    Video Clips Figure 16: Static Images of Video Clips
    Source
    Length
    Emotion Labels
    Table 1 : Clip Criteria
    Format
     Evaluation by Practitioners Content Critique
    Interface Critique
     Operational Modes Plush Toy Interface Figure 17: Dwarf Faces Interactive Modes Applied Behavior Analytic Mode
    Story-Based Mode
    Application Development Software Figure 18: Application Architecture Hardware Doll Switch Figure 19: Doll's Touch Doll Packaging Figure 20: Doll's Hardware Box Doll Features Figure 21: Dwarf Front and Back
    Figure 22: Doll's Recording Unit
    Figure 23: Doll's Stand
    Wireless Communication Figure 24: System Communication Box
    Figure 25: Doll's iRX
    Figure 26: Doll's Communication Device
    Apparatus Figure 27: Appartus for Study
    General Procedures Figure 28: Child's Interaction Experimental Conditions
    Statistics Gathered Formula 1: Response Rate
    Formula 2: Accuracy Rate
    Formula 3: Fluency
     ASQ_Chapter 4: Evaluation

     ASQ_Table of Contents